


How to manage custom reports?
Koha's data is stored in a MySQL database which means that librarians can generate nearly any report they would like by either using the Guided Reports Wizard or writing their own SQL query.
1.1.1 Guided Report Wizard
The guided report wizard will walk you through a six step process to generate a report.
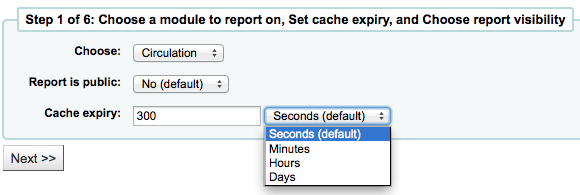
Step 1: Choose the module you want to report on. This will determine what tables and fields are available for you to query.
'Report is public' should be left to the default of 'No' in most cases. A report can be made public if you intend to allow access to it through the JSON webservice interface. This is a system that can be used by developers to make custom presentations of the data from the report, for example displaying it using a graphing API. To learn more speak to your local developer.
-
A public report is accessible via a URL that looks like this: http://MYOPAC/cgi-bin/koha/svc/report?id=REPORTID

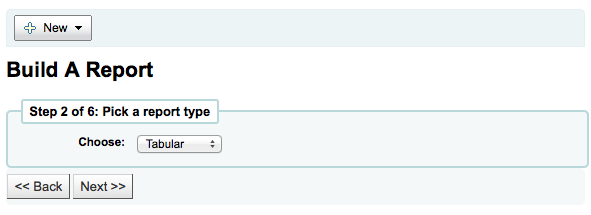
Step 2: Choose a report type. For now, Tabular is the only option available.
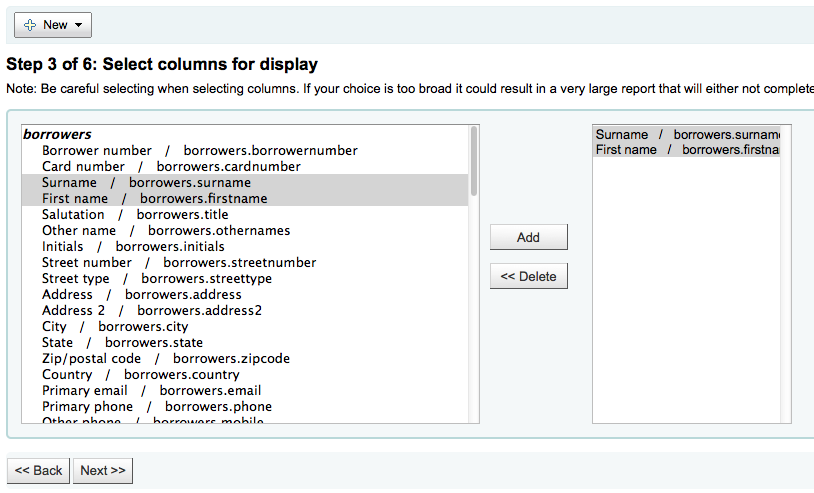
Step 3: Choose the fields you want in your report. You can select multiple fields and add them all at once by using CTRL+Click on each item you want to add before clicking the Add button.
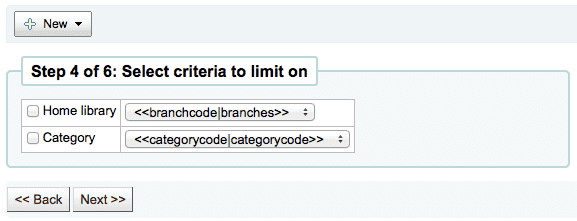
Step 4: Choose any limits you might want to apply to your report (such as item types or branches). If you don't want to apply any limits, simply click Next instead of making an option.
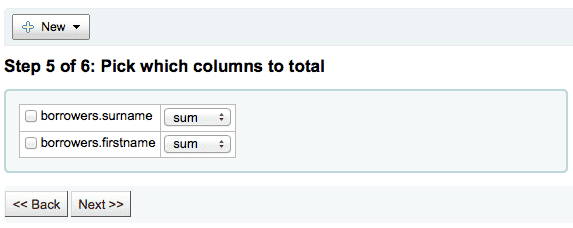
Step 5: Perform math functions. If you don't want to do any calculations, simply click Next instead of making an option.
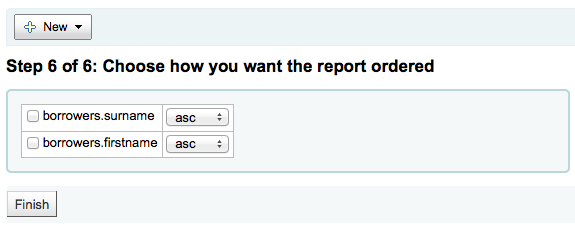
Step 6: Choose data order. If you want the data to print out in the order it's found in the database, simply click Finish.
When you are finished you will be presented with the SQL generated by the report wizard. From here you can choose to save the report by clicking 'Save' or copy the SQL and make edits to it by hand.

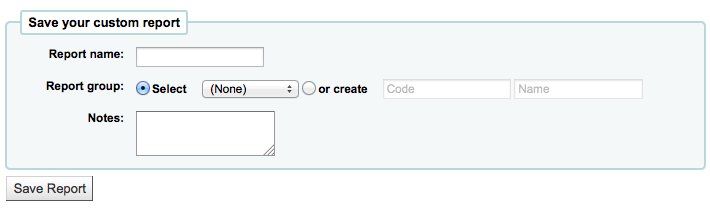
If you choose to save the report you will be asked to name your report, sort it in to groups and subgroups and enter any notes regarding it.
Once your report is saved it will appear on the 'Use Saved' page with all other saved reports.
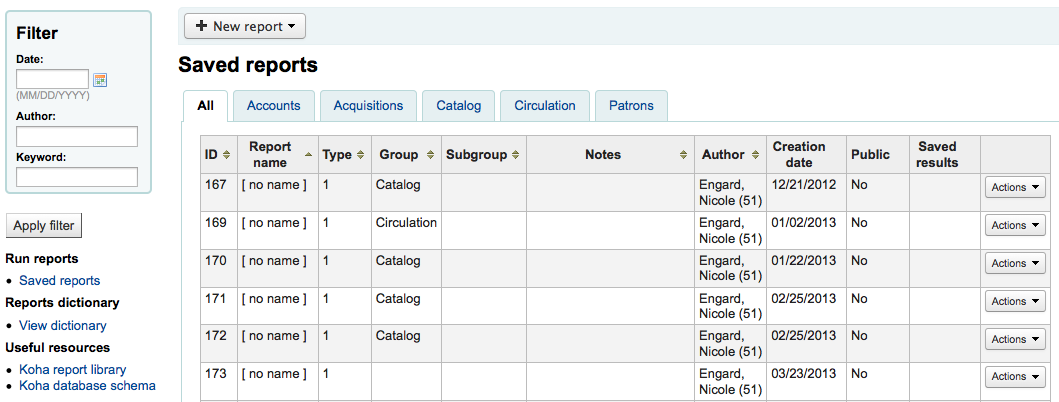
From here you can make edits, run the report, or schedule a time to have the report run. To find the report you created you can sort by any of the columns by clicking the on the column header (creation date is the best bet for finding the report you just added). You can also filter your results using the filter menu on the left or use the tabs to find reports based on your custom groups.