


How to add a new patron?
Patrons are added by going to the 'Patrons' module.
Get there: Patrons
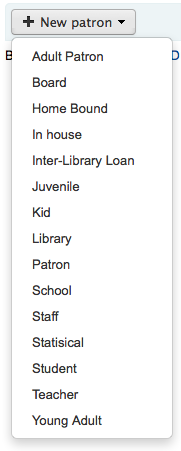
Click 'New patron'
The fields that appear on the patron add form can be controlled by editing the BorrowerUnwantedField system preference.
First enter the identifying information regarding your patron
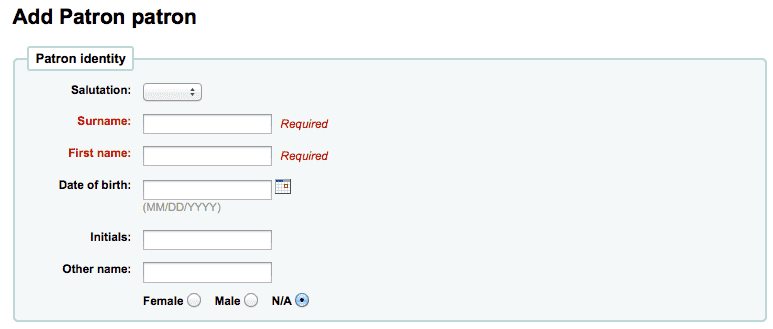
- Required fields are defined in the BorrowerMandatoryField system preference
- Salutation is populated by the BorrowersTitles system preference
Next enter the contact information
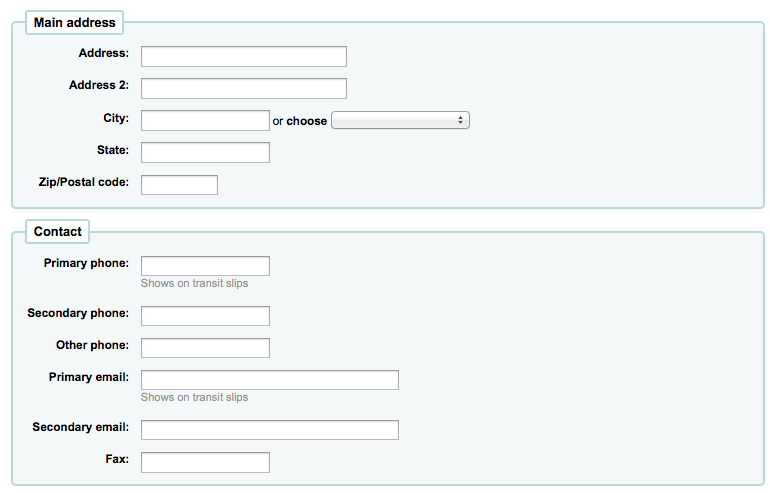
- For contact information, note that the primary phone and email addresses are the ones that appear on notices and slips printed during circulation (receipts, transfer slips and hold slips). The primary email is also the one that overdue notices and other messages go to.
If this patron is a child, you will be asked to attach the child patron to an adult patron

- Click 'Set to Patron' to search your system for an existing patron
- If the Guarantor is not in the system, you can enter the first and last name in the fields available
- The relationships are set using the borrowerRelationship system preference
If this patron is a professional, you will be asked to attach the patron to an organizational patron

- Click 'Set to Patron to search your system for an existing patron
Each patron can have an alternate contact
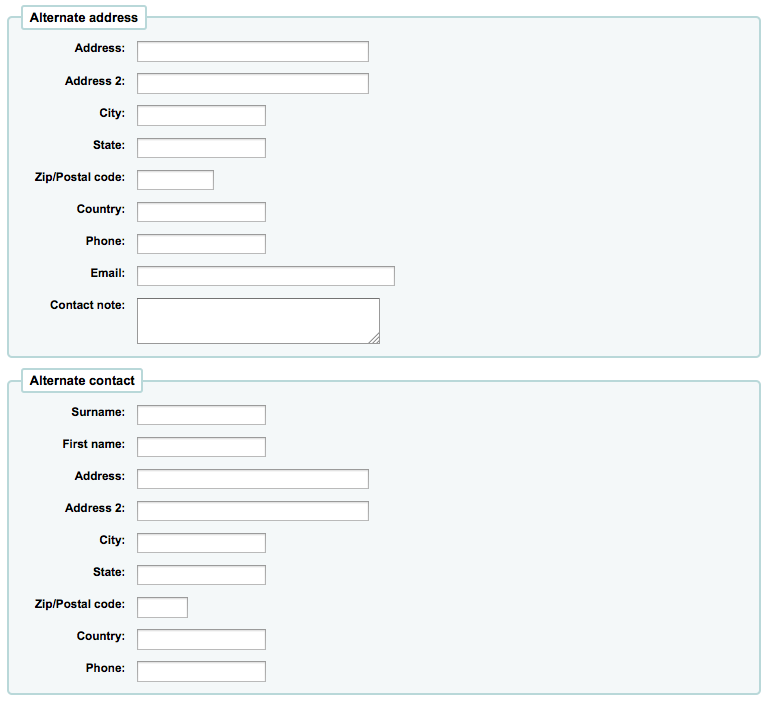
- An alternate contact could be a parent or guardian. It can also be used in academic settings to store the patron's home address.
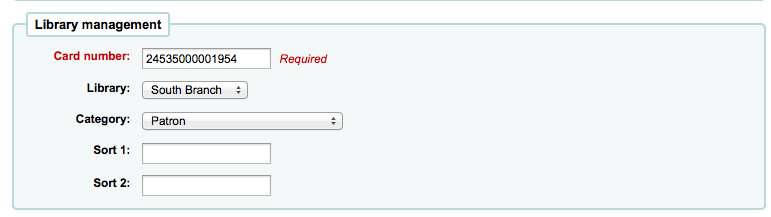
The library management section includes values that are used within the library
-
The card number field is automatically calculated if you have the autoMemberNum system preference set that way
- If you accidentally chose the wrong patron category at the beginning you can fix that here
- Sort 1 and 2 are used for statistical purposes within your library
Next, the Library Setup section includes additional library settings
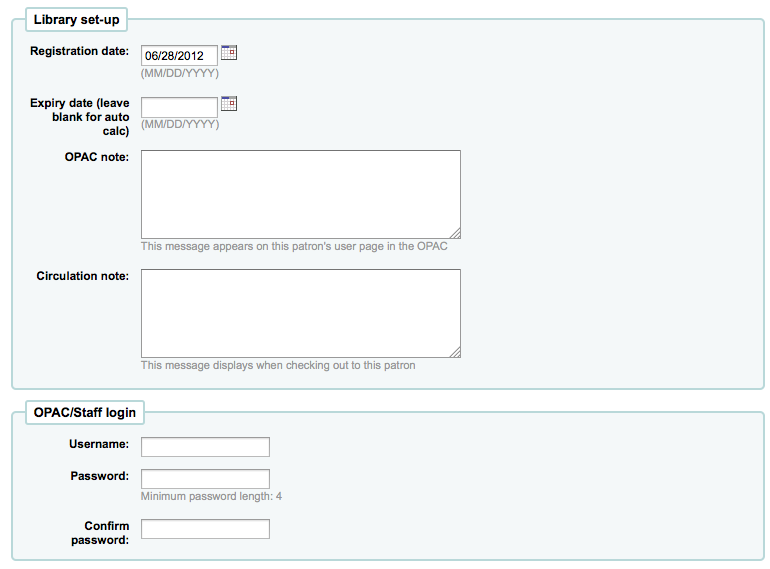
- The registration date will automatically be filled in with today's date
- If your patron cards expire (based on your patron category settings) the Expiry date will automatically be calculated
- The OPAC Note is a note for the patron - it will appear in the OPAC on the patron's record
-
The Circulation Note is meant solely for your library staff and will appear when the circulation staff goes to check an item out to the patron
-
The Staff/OPAC asks for the username and password to be used by the patron (and/or staff member) to log into their account in the OPAC and for staff to log in to the staff client.
- Staff will only be able to use this log in info to log in to the staff client if they have the necessary permissions.
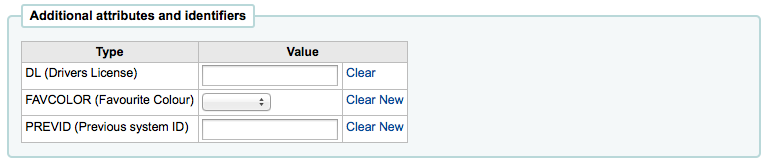
If you have set additional patron attributes up, these will appear next
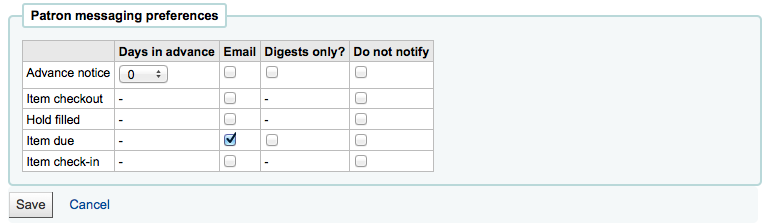
Finally, if you have EnhancedMessagingPreferences set to 'allow,' you can choose the messaging preferences for this patron.
-
These notices are:
- Advanced notice : A notice in advance of the patron's items being due (The patron can choose the number of days in advance)
- Item checkout : A notice that lists all the of the items the patron has just checked out and/or renewed, this is an electronic form of the checkout receipt
- Hold filled : A notice when you have confirmed the hold is waiting for the patron
- Item due : A notice on the day and item is due back at the library
- Item check-in : A notice that lists all the of the items the patron has just checked in
- Patrons can choose to receive their notices as a digest by checking the 'Digest only?' box along with the delivery method. A digest is a combination of all the messages of that type (so all items due in 3 days in one email) in to one email instead of multiple emails for each alert.
Once finished, click 'Save'
If the system suspects this patron is a duplicate of another it will warn you.

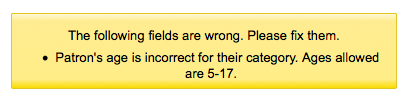
If you have set a minimum or upper age limit on the patron category and are requiring that the birth date be filled in, Koha will warn you if the patron you're adding is too old or young for the patron category you have selected: