


Koha Administration
How to set catalog controls?
Set these controls before you start cataloging on your Koha system.
-
Get there: More > Administration > Catalog
Set these controls before you start cataloging on your Koha system.
-
Get there: More > Administration > Catalog
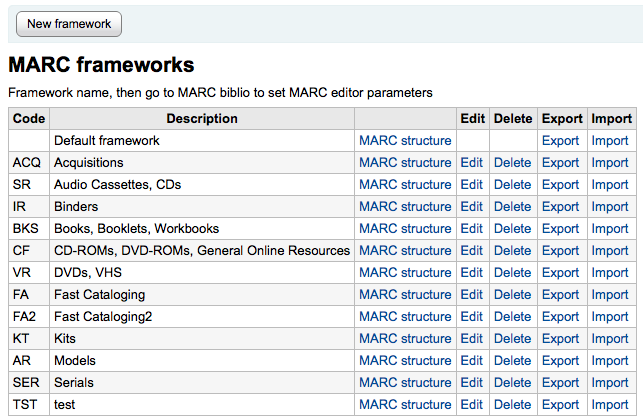
Think of Frameworks as templates for creating new bibliographic records. Koha comes with some predefined frameworks that can be edited or deleted, and librarians can create their own frameworks for content specific to their libraries.
-
Get there: More > Administration > Catalog > MARC Bibliographic Frameworks
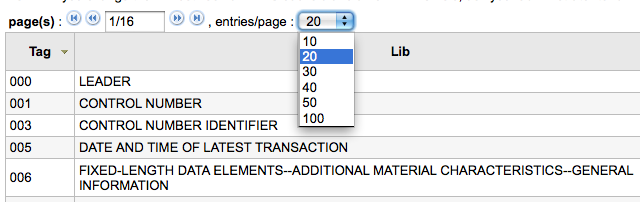
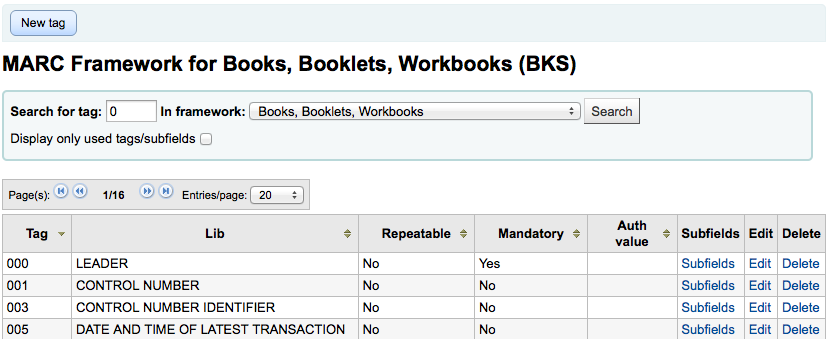
After clicking the 'MARC structure' link to the right of each framework you can decide how many fields you want to see on one screen by using the pagination options at the top of the table.
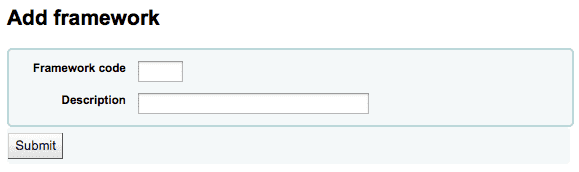
4.1.1. Add New Framework
To add a new framework
-
Click 'New Framework'
-
Enter a code of 4 or fewer characters
-
Use the Description field to enter a more detailed definition of your framework
-
-
Click 'Submit'
-
Once your Framework is added click 'MARC structure' to the right of it on the list of Frameworks

-
You will be asked to choose a Framework to base your new Framework off of, this will make it easier than starting from scratch
-
-
Once your Framework appears on the screen you can edit or delete each field by following the instructions for editing subfields
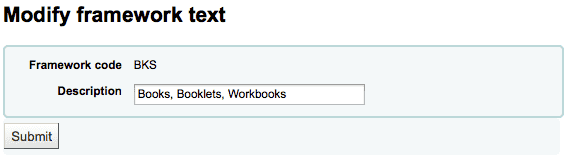
4.1.2. Edit Existing Frameworks
Clicking 'Edit' to the right of a Framework will only allow you to edit the Description for the Framework:
To make edits to the fields associated with the Framework you must first click 'MARC Structure' and then follow the instructions for editing subfields
4.1.3. Add subfields to Frameworks
To add a field to a Framework click the 'New Tag' button at the top of the Framework definition
This will open up a blank form for entering MARC field data
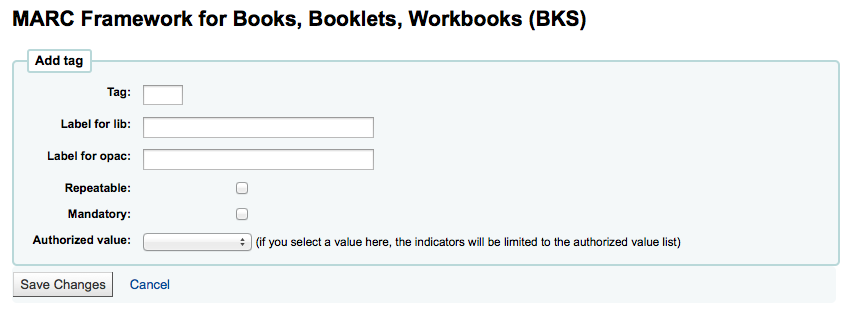
Enter the information about your new tag:
-
The 'Tag' is the MARC field number
-
The 'Label for lib' is the text that will appear in the staff client when in the cataloging module
-
The 'Label for OPAC' is the text that will appear in the OPAC when viewing the MARC version of the record
-
If this field can be repeated, check the 'Repeatable' box
-
If this field is mandatory, check the 'Mandatory' box
-
If you want this field to be a pull down with limited possible answers, choose which 'Authorized value' list you want to use
When you're finished, click 'Save Changes' and you will be presented with your new field

To the right of the new field is a link to 'Subfields,' you will need to add subfields before this tag will appear in your MARC editor. The process of entering the settings for the new subfield is the same as those found in the editing subfields in frameworks section of this manual.
4.1.4. Edit Framework Subfields
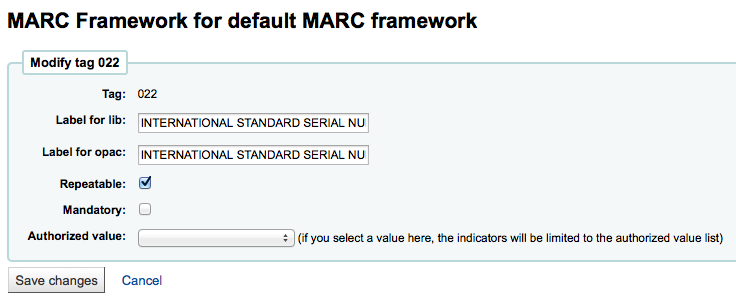
Frameworks are made up of MARC fields and subfields. To make edits to most Frameworks you must edit the fields and subfields. Clicking 'Edit' to the right of each subfield will allow you to make changes to the text associated with the field
-
Each field has a tag (which is the MARC tag) that is uneditable
-
The 'Label for lib' is what will show in the staff client if you have advancedMARCeditor set to display labels
-
The 'Label for OPAC' is what will show on the MARC view in the OPAC
-
If you check 'Repeatable' then the field will have a plus sign next to it allowing you to add multiples of that tag
-
If you check 'Mandatory' the record will not be allowed to save unless you have a value assigned to this tag
-
'Authorized value' is where you define an authorized value that your catalogers can choose from a pull down to fill this field in
-
To edit the subfields associated with the tag, click 'Subfields' to the right of the tag on the 'MARC Structure' listing
-
From the list of subfields you can click 'Delete' to the right of each to delete the subfields
-
To edit the subfields click 'Edit Subfields'
-
For each subfield you can set the following Basic constraint values
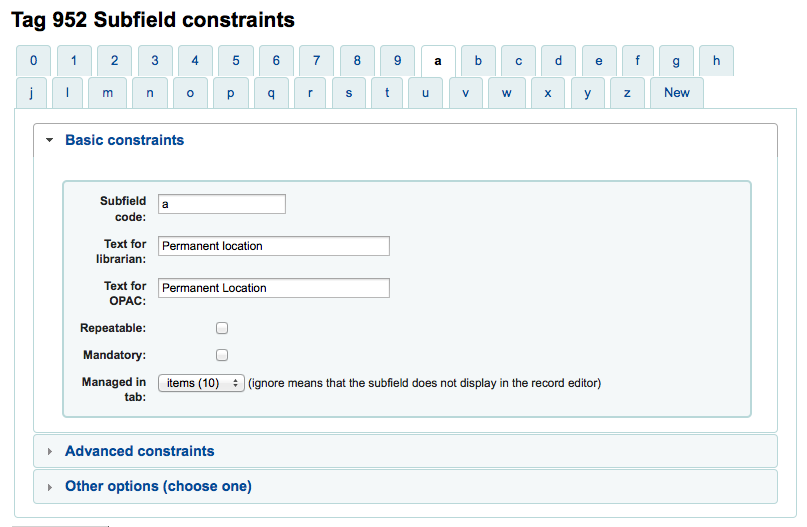
-
Text for librarian
-
what appears before the subfield in the librarian interface
-
-
Text for OPAC
-
what appears before the field in the OPAC.
-
If left empty, the text for librarian is used instead
-
-
-
Repeatable
-
the field will have a plus sign next to it allowing you to add multiples of that tag
-
-
Mandatory
-
the record will not be allowed to save unless you have a value assigned to this tag
-
-
Managed in tab
-
defines the tab where the subfield is shown. All subfields of a given field must be in the same tab or ignored. Ignore means that the subfield is not managed.
-
-
-
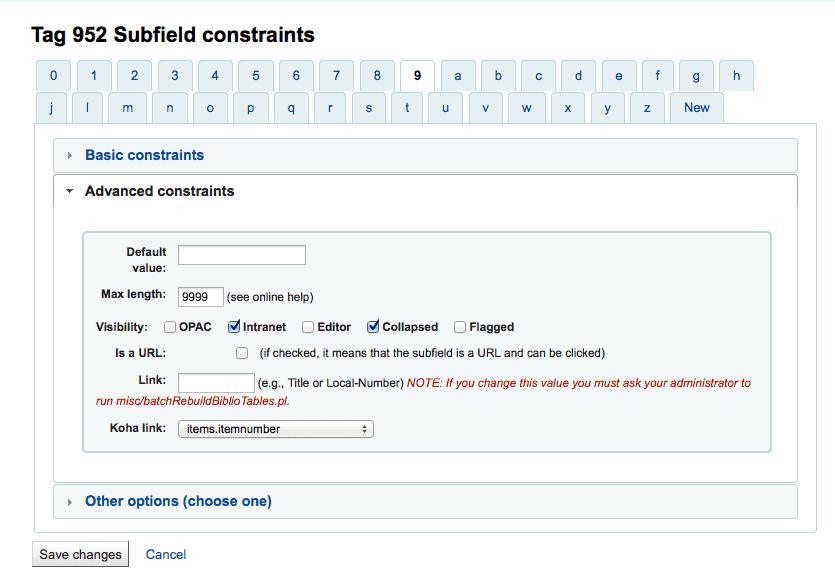
For each subfield you can set the following Advanced constraint values
-
Default value
-
defines what you want to appear in the field by default, this will be editable, but it saves time if you use the same note over and over or the same value in a field often.
Visibility
allows you to select from where this subfield is visible/hidden, simply check the boxes where you would like the field to show and uncheck the boxes where you would like it hidden.

Is a URL
if checked, it means that the subfield is a URL and can be clicked
Link
If you enter a field/subfield here (200b), a link appears after the subfield in the MARC Detail view. This view is present only in the staff client, not the OPAC. If the librarian clicks on the link, a search is done on the database for the field/subfield with the same value. This can be used for 2 main topics :
on a field like author (200f in UNIMARC), put 200f here, you will be able to see all bib records with the same author.
on a field that is a link (4xx) to reach another bib record. For example, put 011a in 464$x, will find the serials that are with this ISSN.
Warning
This value should not change after data has been added to your catalog. If you need to change this value you must ask your system administrator to run misc/batchRebuildBiblioTables.pl.
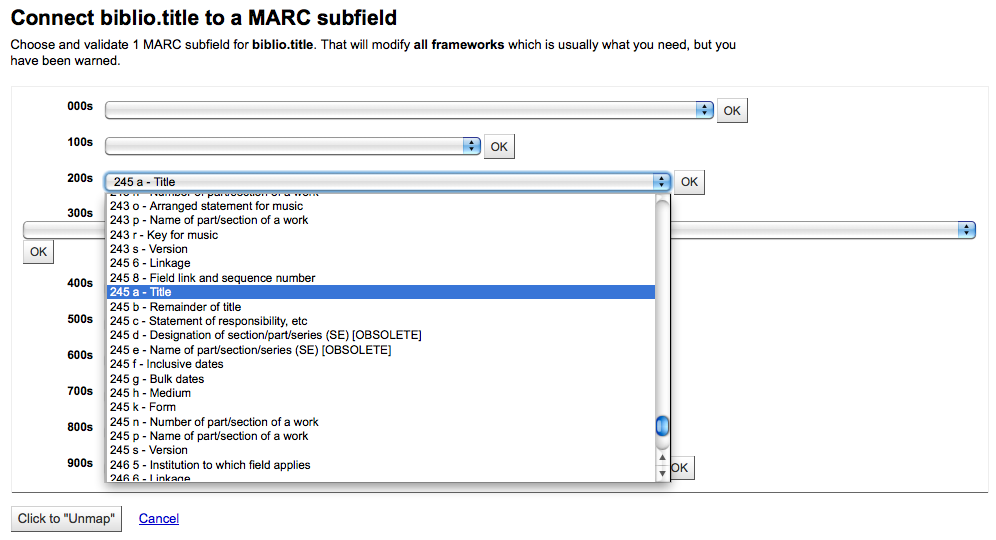
Koha link
Koha is multi-MARC compliant. So, it does not know what the 245$a means, neither what 200$f (those 2 fields being both the title in MARC21 and UNIMARC). So, in this list you can "map" a MARC subfield to its meaning. Koha constantly maintains consistency between a subfield and its meaning. When the user want to search on "title", this link is used to find what is searched (245 if you're MARC21, 200 if you're UNIMARC).
-
For each subfield you can set the following Other option values
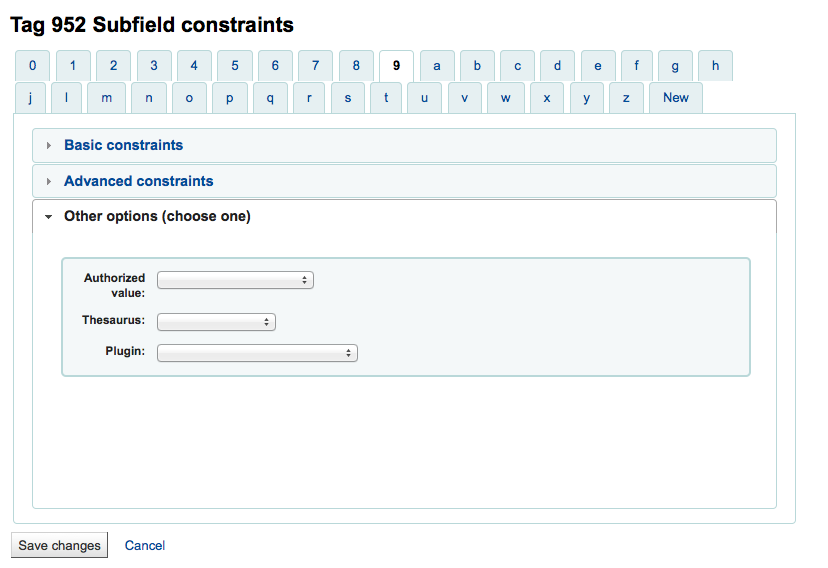
Authorized value
means the value cannot by typed by the librarian, but must be chosen from a pull down generated by the authorized value list
In the example above, the 504a field will show the MARC504 Authorized Values when cataloging

Thesaurus
means that the value is not free text, but must be searched in the authority/thesaurus of the selected category
Plugin
means the value is calculated or managed by a plugin. Plugins can do almost anything.
Examples:
For call numbers there is an option to add a call number browser next to the the call number subfield so that you can identify which call numbers are in use and which are not. Simply choose the cn_browser.pl plugin. Learn more in the cataloging section of this manual.
If you'd like to let file uploads via cataloging you can choose the upload.pl plugin and this will allow you to upload files to Koha to link to your records.
In UNIMARC there are plugins for every 1xx fields that are coded fields. The plugin is a huge help for cataloger! There are also two plugins (unimarc_plugin_210c and unimarc_plugin_225a that can "magically" find the editor from an ISBN, and the collection list for the editor)
To save your changes simply click the 'Save Changes' button at the top of the screen
-
4.1.5. Import/Export Frameworks
Next to each framework is a link to either import or export the framework.
4.1.5.1. Export Framework
To export a framework simply click the 'Export' link to the right of framework title.

When you click 'Export' you will be prompted to choose what format to export the file in.
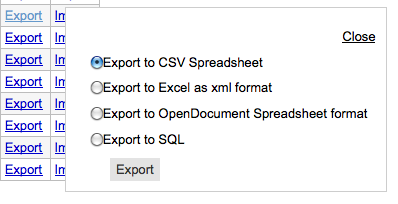
A framework exported this way can be imported into any other Koha installation using the import framework option.
4.1.5.2. Import Framework
An easy way to create a new framework is to import one created for your or another Koha installation. This framework would need to be exported from the other system using the instructions above to be available for import here.
To import a framework you first need to create a new framework. Once you have that framework, click 'Import' to the right of the new framework.
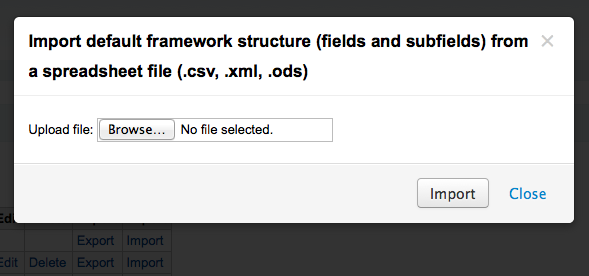
You will be prompted to find a file on your computer to import into the framework.
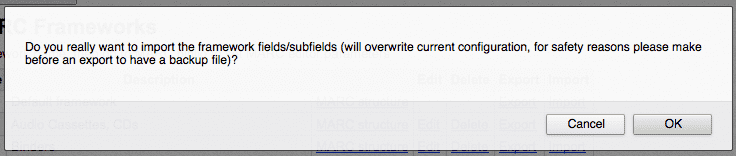
You will be asked to confirm your actions before the file is imported.
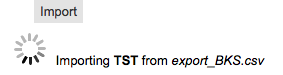
As your file is uploaded you will see an image that will confirm that the system is working.
Once your import is complete you will be brought to the framework edit tool where you can make any changes you need to the framework you imported.
4.2. Koha to MARC Mapping
While Koha stores the entire MARC record, it also stores common fields for easy access in various tables in the database. Koha to MARC Mapping is used to tell Koha where to find these values in the MARC record. In many cases you will not have to change the default values set by in this tool on installation, but it is important to know that the tool is here and can be used at any time.
-
Get there: More > Administration > Catalog > Koha to MARC Mapping
The Koha to MARC Mapping page offers you the option of choosing from one of three tables in the database to assign values to.
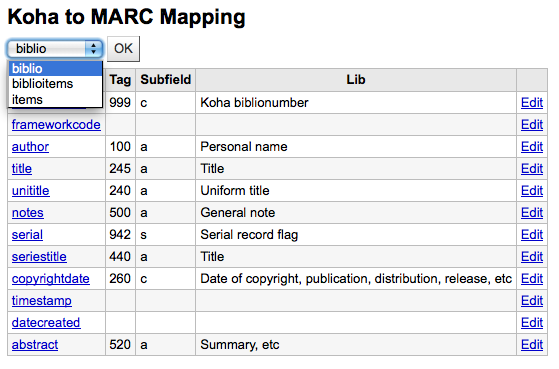
After choosing the table you would like to view, click 'OK.' To edit any mapping click on the 'Koha Filed' or the 'Edit' link.
Choose which MARC field you would like to map to this Koha Field and click the 'OK' button. If you would like to clear all mappings, click the 'Click to "Unmap"' button.
This tool will allow you to map MARC fields to a set of predefined keywords.
-
Get there: More > Administration > Catalog > Keywords to MARC Mapping
At this time the only keyword in use is 'subtitle.'
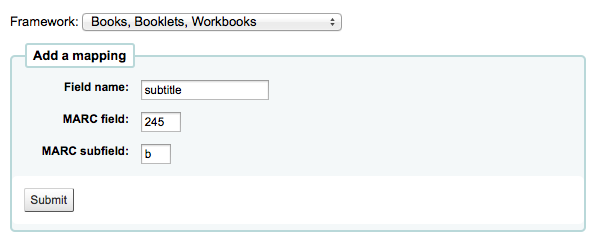
Using this tool you can define what MARC field prints to the detail screen of the bibliographic record using keywords. The following example will use the subtitle field.
Using the Framework pull down menu, choose the Framework you would like to apply this rule to. For example, the subtitle for books can be found in the 245$b field.
However the subtitle for DVDs appears in 245$p
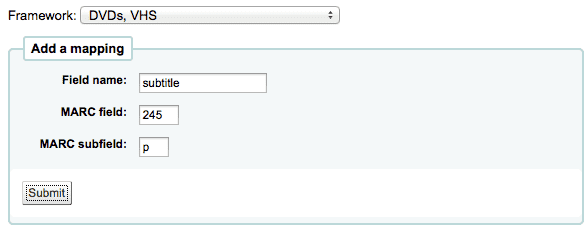
Using this tool you can tell Koha to print the right field as the subtitle when viewing the bibliographic record in the OPAC.
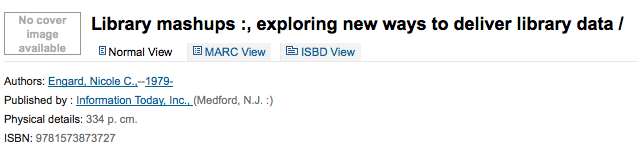
This tool can be used to chain together pieces of the record as well. If you want the series number to show in the title on your search results you simply have to map 490 $v to 'subtitle' along with the 245 $b.
Future developments will include additional keyword assigned fields.
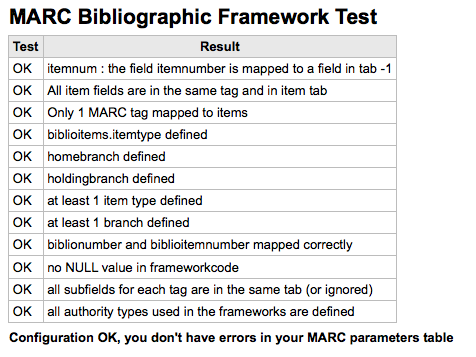
Checks the MARC structure.
-
Get there: More > Administration > Catalog > MARC Bibliographic Framework Test
If you change your MARC Bibliographic framework it's recommended that you run this tool to test for errors in your definition.
4.5. Authority Types
Authority Types are basically MARC Frameworks for Authority records and because of that they follow the same editing rules found in the MARC Bibliographic Frameworks section of this manual. Koha comes with many of the necessary Authority frameworks already installed. To learn how to add and edit Authority Types, simply review the MARC Bibliographic Frameworks section of this manual.
-
Get there: More > Administration > Catalog > Authority Types
Source of classification or shelving scheme is an Authorized Values category that is mapped to field 952$2 and 942$2 in Koha's MARC Bibliographic frameworks and stored in the items.cn_source field in the database.
-
Get there: More > Administration > Catalog > Classification sources
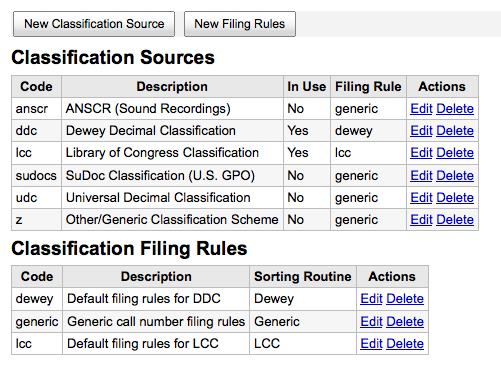
Commonly used values of this field are:
-
ddc - Dewey Decimal Classification
-
lcc - Library of Congress Classification
If you chose to install classification sources during Koha's installation, you would see other values too:
-
ANSCR (sound recordings)
-
SuDOC classification
-
Universal Decimal Classification
-
Other/Generic Classification
You can add your own source of classification by using the New Classification Source button. To edit use the Edit link.
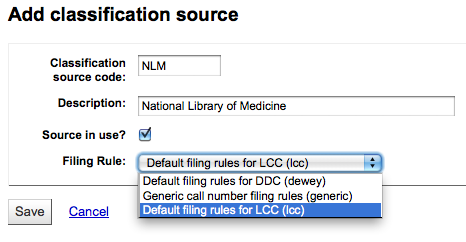
When creating or editing:
-
You will need to enter a code and a description.
-
Check the 'Source in use?' checkbox if you want the value to appear in the drop down list for this category.
-
Select the appropriate filing rule from the drop down list.
4.6.2. Classification Filing Rules
Filing rules determine the order in which items are placed on shelves.
Values that are pre-configured in Koha are:
-
Dewey
-
LCC
-
Generic
Filing rules are mapped to Classification sources. You can setup new filing rules by using the New Filing Rule button. To edit use the Edit link.
When creating or editing:
-
Enter a code and a description
-
Choose an appropriate filing routine - dewey, generic or lcc
Record matching rules are used when importing MARC records into Koha.
-
Get there: More > Administration > Catalog > Record Matching Rules
The rules that you set up here will be referenced with you Stage MARC Records for Import.
It is important to understand the difference between Match Points and Match Checks before adding new matching rules to Koha.
Match Points are the criteria that you enter that must be met in order for an incoming record to match an existing MARC record in your catalog. You can have multiple match points on an import rule each with its own score. An incoming record will be compared against your existing records (‘one record at a time’) and given a score for each match point. When the total score of the matchpoints matches or exceeds the threshold given for the matching rule, Koha assumes a good match and imports/overlays according your specifications in the import process. An area to watch out for here is the sum of the match points. Doublecheck that the matches you want will add up to a successful match.
Example:
Threshold of 1000
Match Point on 020$a 1000
Match Point on 022$a 1000
Match Point on 245$a 500
Match Point on 100$a 100
In the example above, a match on either the 020$a or the 022$a will result in a successful match. A match on 245$a title and 100$a author (and not on 020$a or 022$a) will only add up to 600 and not be a match. And a match on 020$a and 245$a will result in 1500 and while this is a successful match, the extra 500 point for the 245$a title match are superfluous. The incoming record successfully matched on the 020$a without the need for the 245$a match. However, if you assigned a score of 500 to the 100$a Match Point, a match on 245$a title and 100$a author will be considered a successful match (total of 1000) even if the 020$a is not a match.
Match Checks are not commonly used in import rules. However, they can serve a couple of purposes in matching records. First, match checks can be used as the matching criteria instead of the match points if your indexes are stale and out of date. The match checks go right for the data instead of relying on the data in the indexes. (If you fear your indexes are out of date, a rebuild of your indexes would be a great idea and solve that situation!) The other use for a Match Check is as a “double check” or “veto” of your matching rule. For example, if you have a matching rule as below:
Threshold of 1000
Match Point on 020$a 1000
Match Check on 245$a
Koha will first look at the 020$a tag/subfield to see if the incoming record matches an existing record. If it does, it will then move on to the Match Check and look directly at the 245$a value in the incoming data and compare it to the 245$a in the existing ‘matched’ record in your catalog. If the 245$a matches, Koha continues on as if a match was successful. If the 245$a does not match, then Koha concludes that the two records are not a match after all. The Match Checks can be a really useful tool in confirming true matches.
When looking to create matching rules for your authority records the following indexes will be of use:
Table 2.1. Authority Indexes
| Index name | Matches Marc Tag |
|---|---|
| LC-cardnumber | 010$a |
| Personal-name | 100$a |
| Corporate-name-heading | 110$a |
| Meeting-name | 111$a |
| Title-uniform | 130$a |
| Chronological-term | 148$a |
| Subject-topical | 150$a |
| Name-geographic | 151$a |
| Term-genre-form | 155$a |
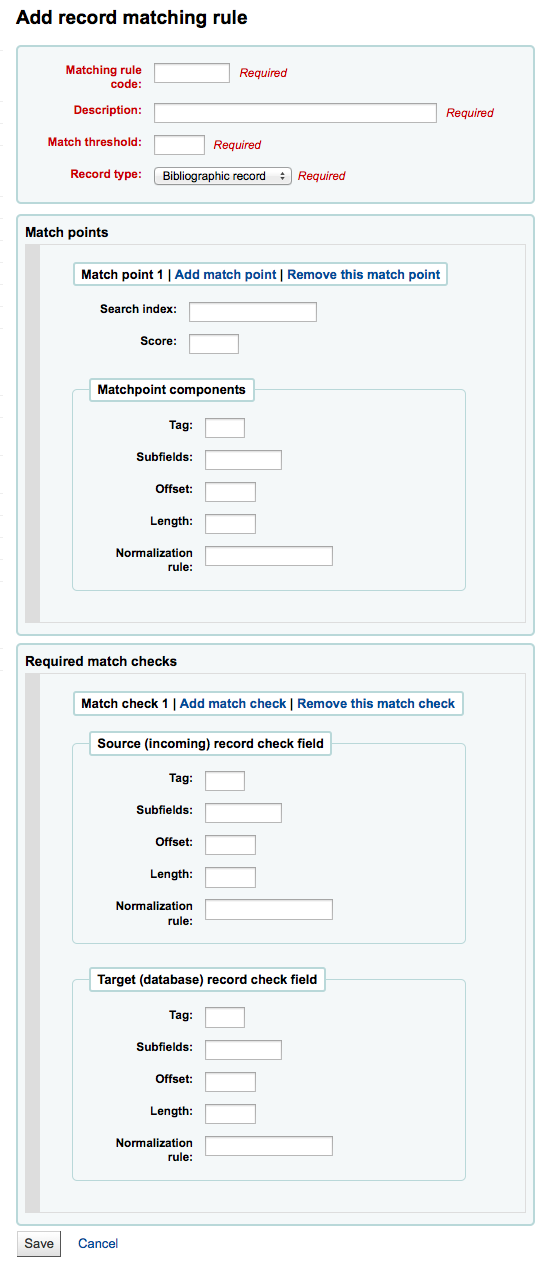
4.7.1. Adding Matching Rules
To create a new matching rule :
-
Click 'New Record Matching Rule'
-
Choose a unique name and enter it in the 'Matching rule code' field
-
'Description' can be anything you want to make it clear to you what rule you're picking
-
'Match threshold' is the total number of 'points' a biblio must earn to be considered a 'match'
-
'Record type' is the type of import this rule will be used for - either authority or bibliographic
-
Match points are set up to determine what fields to match on
-
'Search index' can be found by looking at the ccl.properties file on your system which tells the zebra indexing what data to search for in the MARC data".
-
'Score' - The number of 'points' a match on this field is worth. If the sum of each score is greater than the match threshold, the incoming record is a match to the existing record
-
Enter the MARC tag you want to match on in the 'Tag' field
-
Enter the MARC tag subfield you want to match on in the 'Subfields' field
-
'Offset' - For use with control fields, 001-009
-
'Length' - For use with control fields, 001-009
-
Koha only has one 'Normalization rule' that removes extra characters such as commas and semicolons. The value you enter in this field is irrelevant to the normalization process.
-
'Required match checks' - ??
-

-
Match threshold: 100
-
Record type: Bibliographic
Matchpoints (just the one):
Search index: Control-number
Score: 101
Tag: 001
Subfields: a
Offset: 0
Length: 0
Normalization rule: Control-number
Required Match checks: none (remove the blank one)

On this page you can create, modify and delete OAI-PMH sets
4.8.1. Create a set
To create a set:
-
Click on the link 'Add a new set'
-
Fill the mandatory fields 'setSpec' and 'setName'
-
Then you can add descriptions for this set. To do this click on 'Add description' and fill the newly created text box. You can add as many descriptions as you want.
-
Click on 'Save' button'
4.8.2. Modify/Delete a set
To modify a set, just click on the link 'Modify' on the same line of the set you want to modify. A form similar to set creation form will appear and allow you to modify the setSpec, setName and descriptions.
To delete a set, just click on the link 'Delete' on the same line of the set you want to delete.
4.8.3. Define mappings
Here you can define how a set will be build (what records will belong to this set) by defining mappings. Mappings are a list of conditions on record content. A record only need to match one condition to belong to the set.
-
Fill the fields 'Field', 'Subfield' and 'Value'. For example if you want to include in this set all records that have a 999$9 equal to 'XXX'. Fill 'Field' with 999, 'Subfield' with 9 and 'Value' with XXX.
-
If you want to add another condition, click on 'OR' button and repeat step 1.
-
Click on 'Save'
To delete a condition, just leave at least one of 'Field', 'Subfield' or 'Value' empty and click on 'Save'.
And it is case sensitive : a record having 999$9 = 'xxx' will not belong to a set where condition is 999$9 = 'XXX'.
4.8.4. Build sets
Once you have configured all your sets, you have to build the sets. This is done by calling the script misc/migration_tools/build_oai_sets.pl.
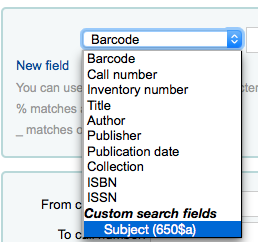
4.9. Item search fields
From here you can add custom search fields to the item search option in the staff client.
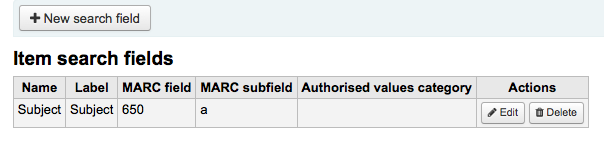
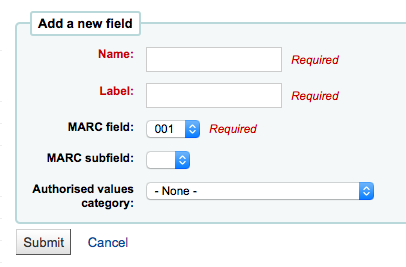
To add a new search term simply click the 'New search field' button
-
Name is a field for you to identify the search term
-
Label is what will appear on the item search page
-
MARC field allows you to pick which field you'd like to search in
-
MARC subfield is the subfield you'd like to search in
-
Authorised values category can be used to turn this search field in to a pull down instead of a free text field
Once your new field is added it will be visible at the top of this page and on the item search page